 Inference
 Marketplace


Introduction
Run EVE-OS as one or more virtual machines on VMware ESXi to operate multiple independent nodes on a single physical host. Any instance of EVE running on a hypervisor as “virtual EVE” or a “virtual node” is referred to as virtual EVE (vEVE). A virtual instance of EVE-OS functions identically to a physical one, with two minor differences:- IOMMU functionality can only be accessed by one virtual node at a time on a given host.
- Virtualization adds some overhead, which may affect performance-sensitive applications.
Prerequisites
- EVE-OS version 9.4.0 or later.
- ESXi server 7.0 Update 3 or later.
- PowerShell/PowerCLI (recommended for the onboarding step).
Add VM Hardware to Your Enterprise
- Log in to ZCLI. See Get Started With ZCLI for authentication steps.
- Create a
hardware.jsonfile for an ESXi VM on your local machine. See the Hardware Models guide for file format details. - List your Docker containers.
- Observe the output from the previous command. Copy the ID of your ZCLI container, shown in the first column of the output. For example:
- Copy your
hardware.jsoninto the ZCLI container’s root directory.
- Create a brand in Edge Infrastructure Services called VMware.
- Create a hardware model called
7.0u3guestusing yourhardware.jsonfile.
Get an EVE-OS ISO
Pull the EVE-OS ISO for your target version from Docker Hub. The following example uses version 9.4.0 for AMD64.Configure a Network Port Group on ESXi
Create a new port group with the following security settings set to Accept:- Promiscuous mode
- MAC address changes
- Forged transmits
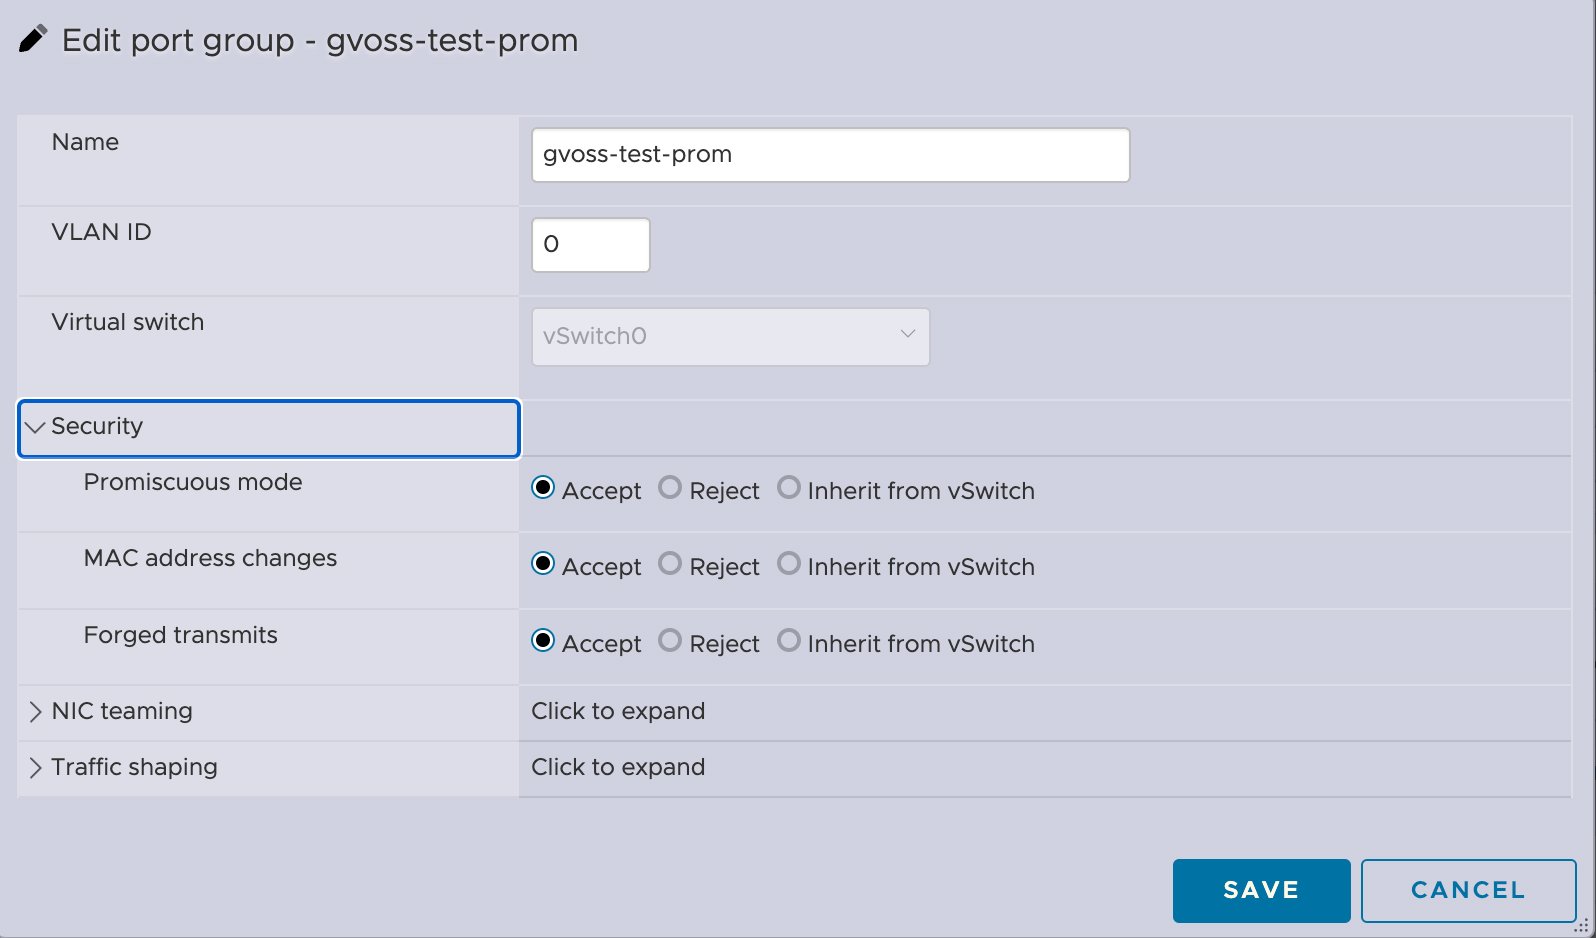
Create the Virtual Machine
Complete the following sub-sections in order to create the vEVE VM.Create a new VM
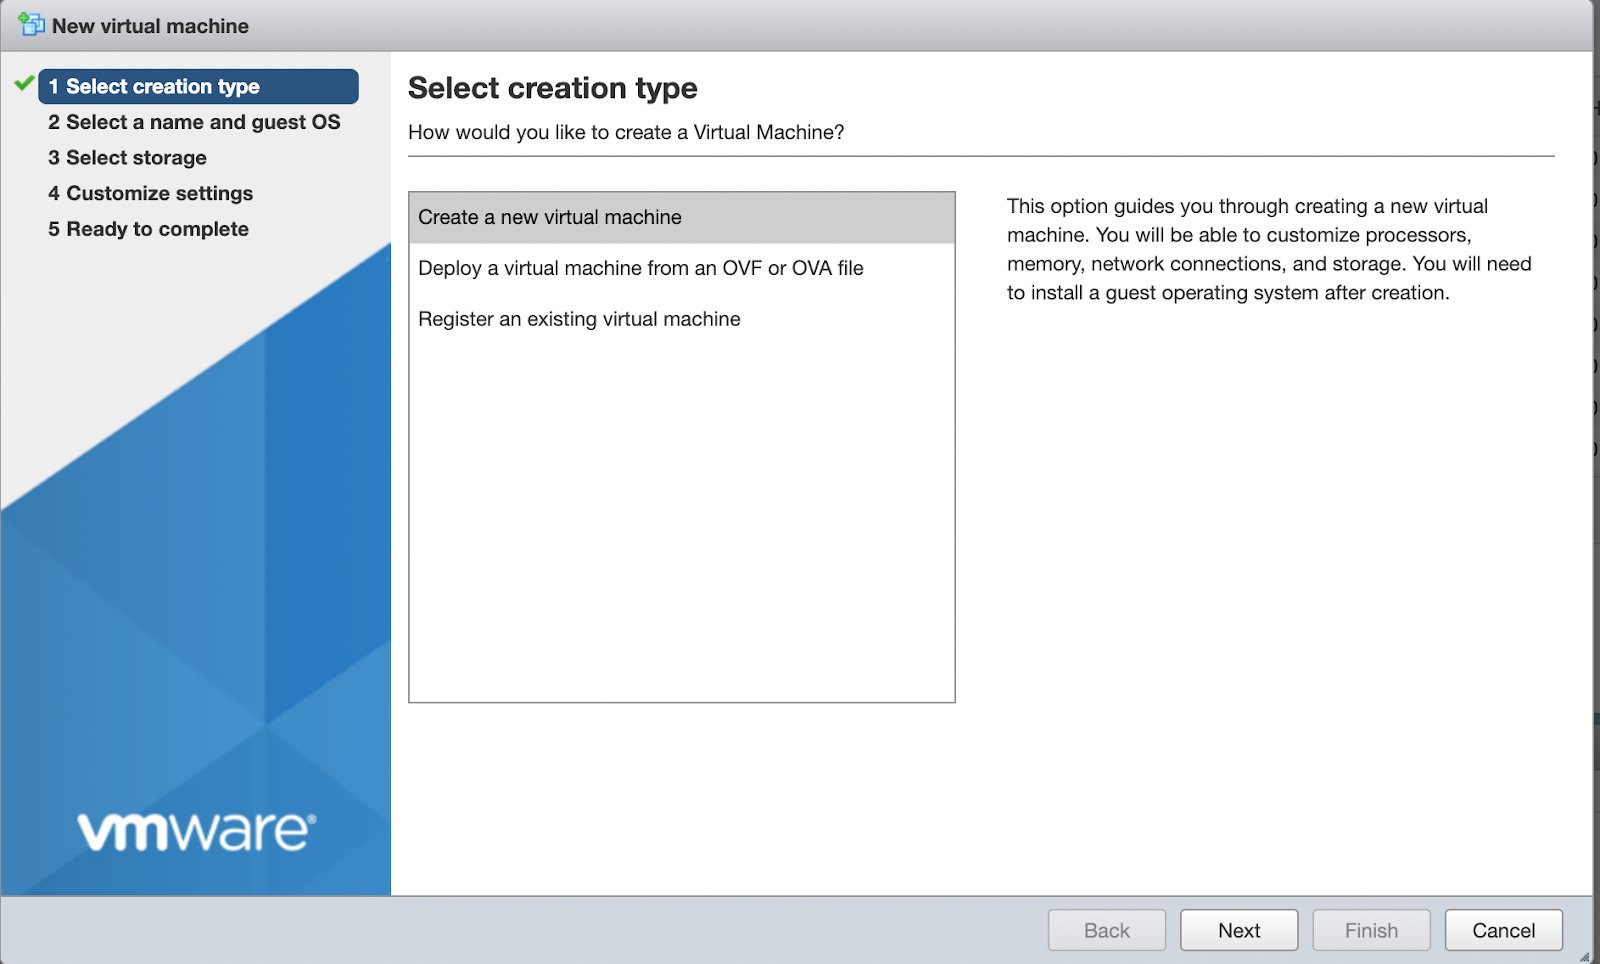
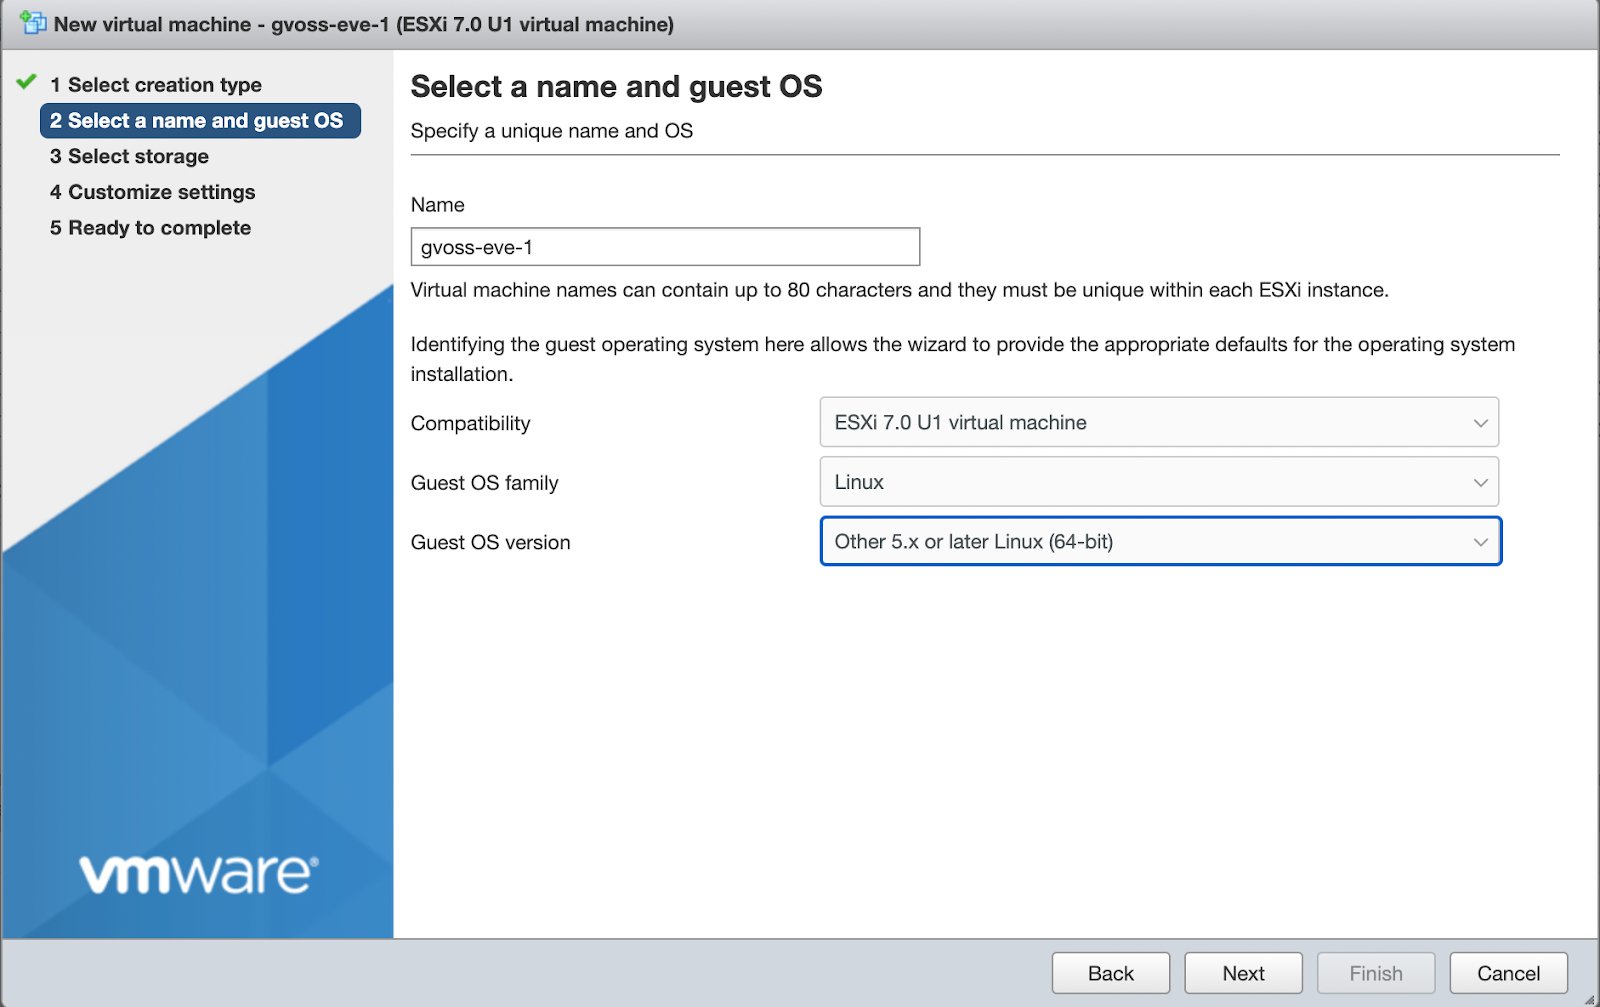
Select Guest OS family and Guest OS version
VM storage
Select a datastore to host the vEVE VM.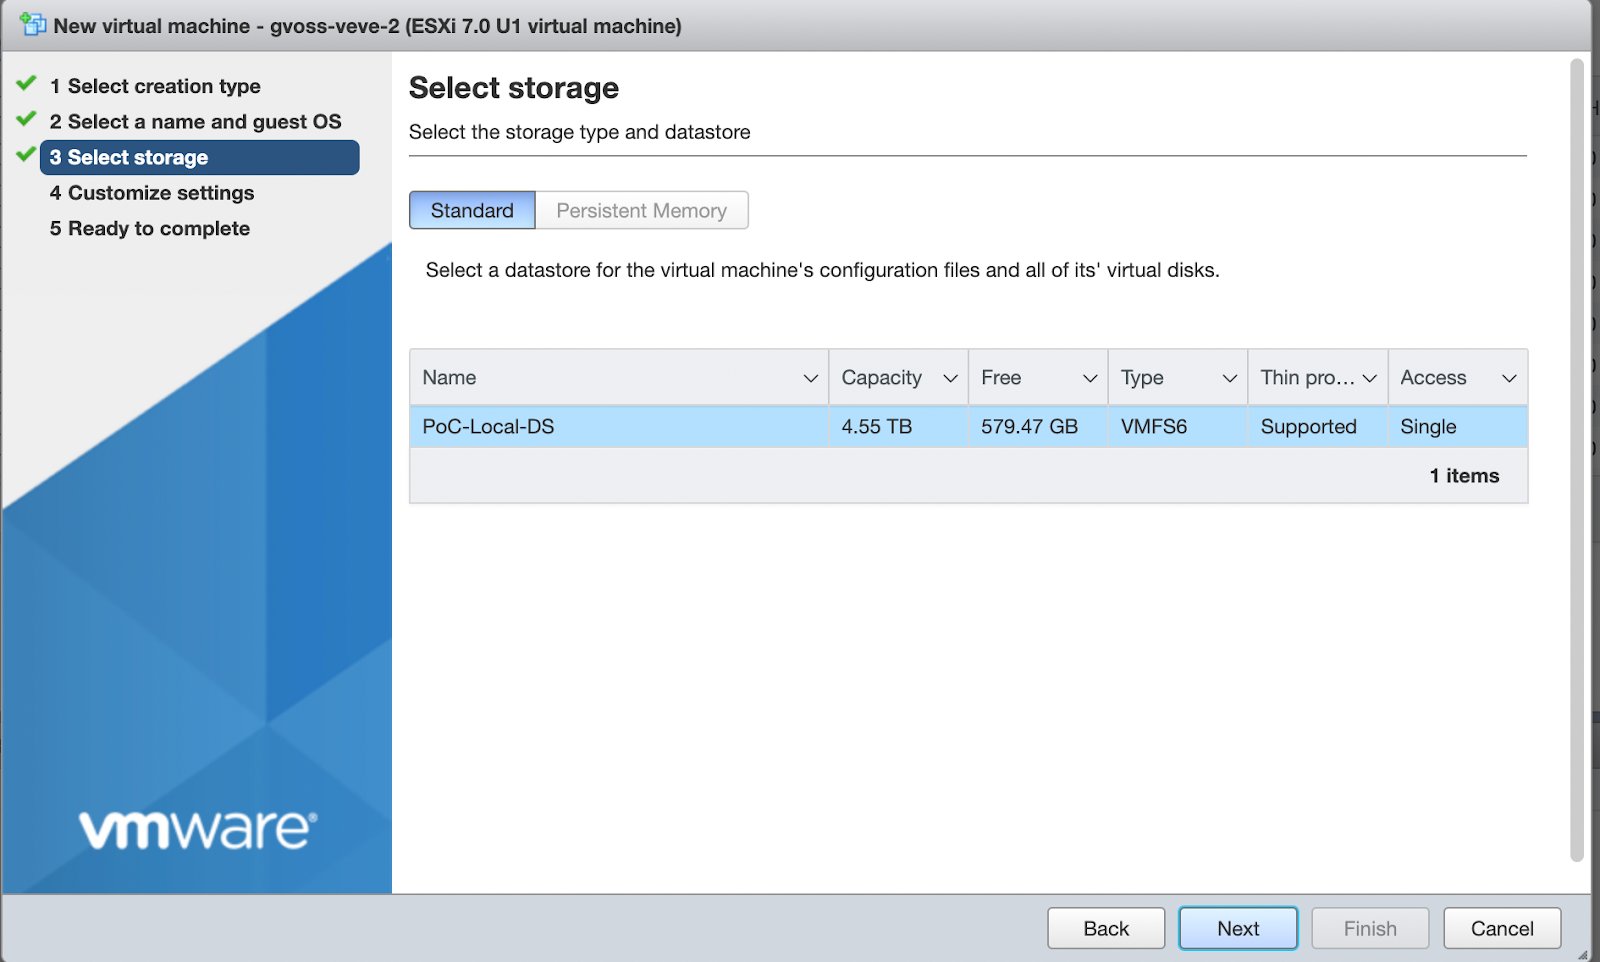
CPU settings
Enable the following options in the CPU section: Hardware virtualization, IOMMU, and Performance counters.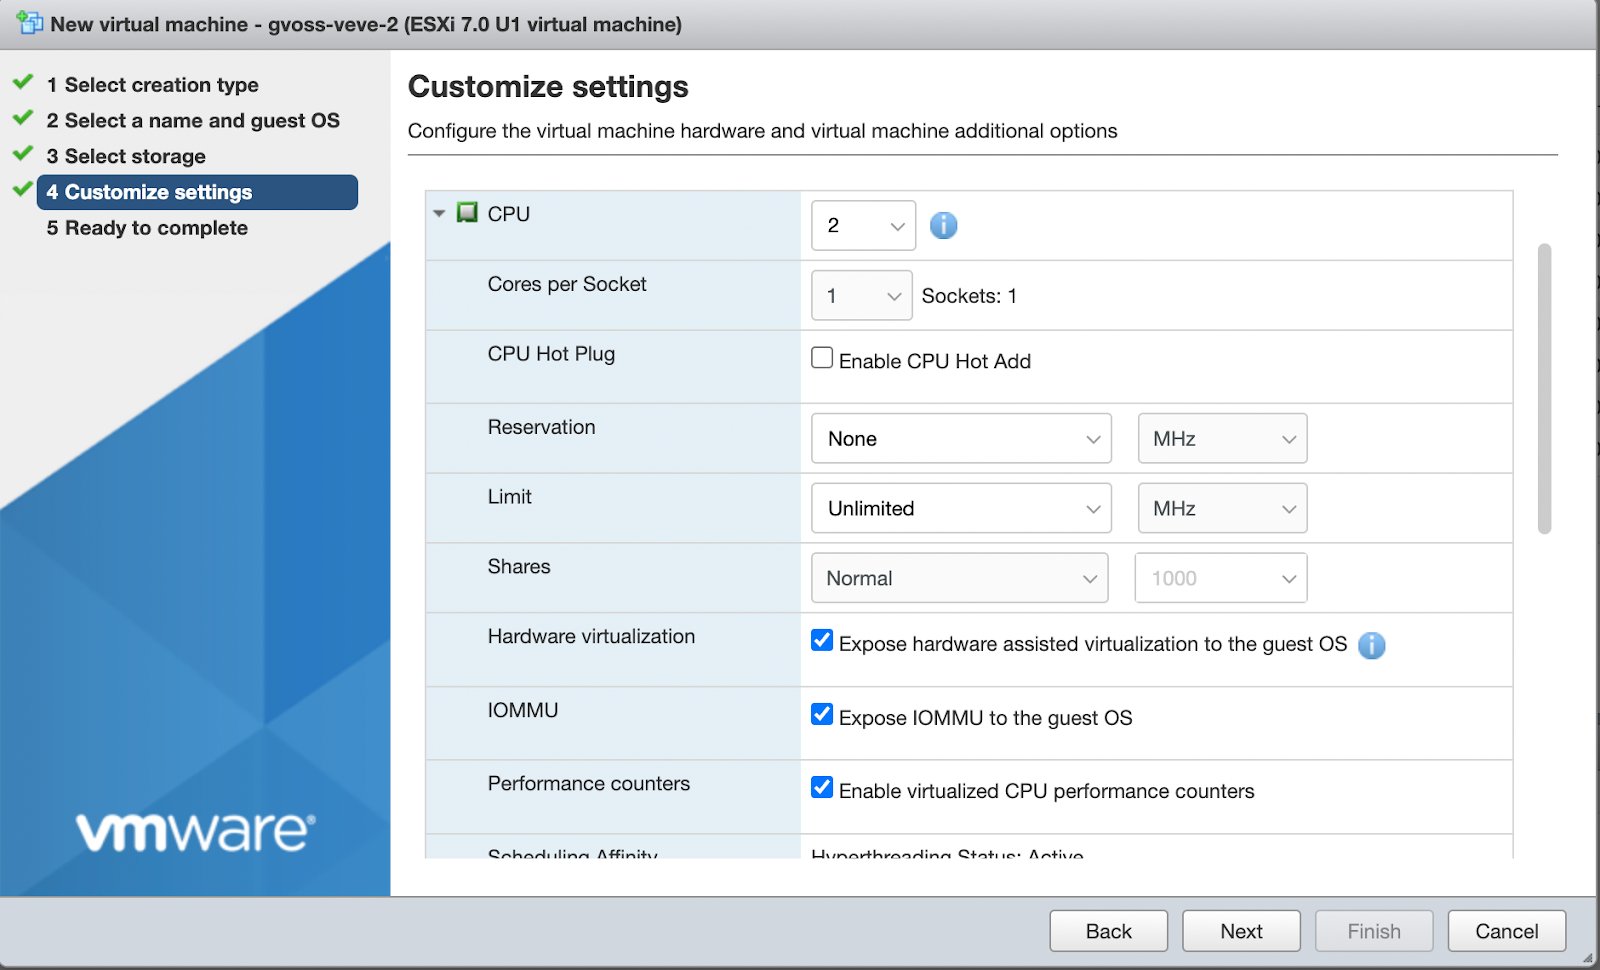
Network settings
Assign the port group created in the previous section.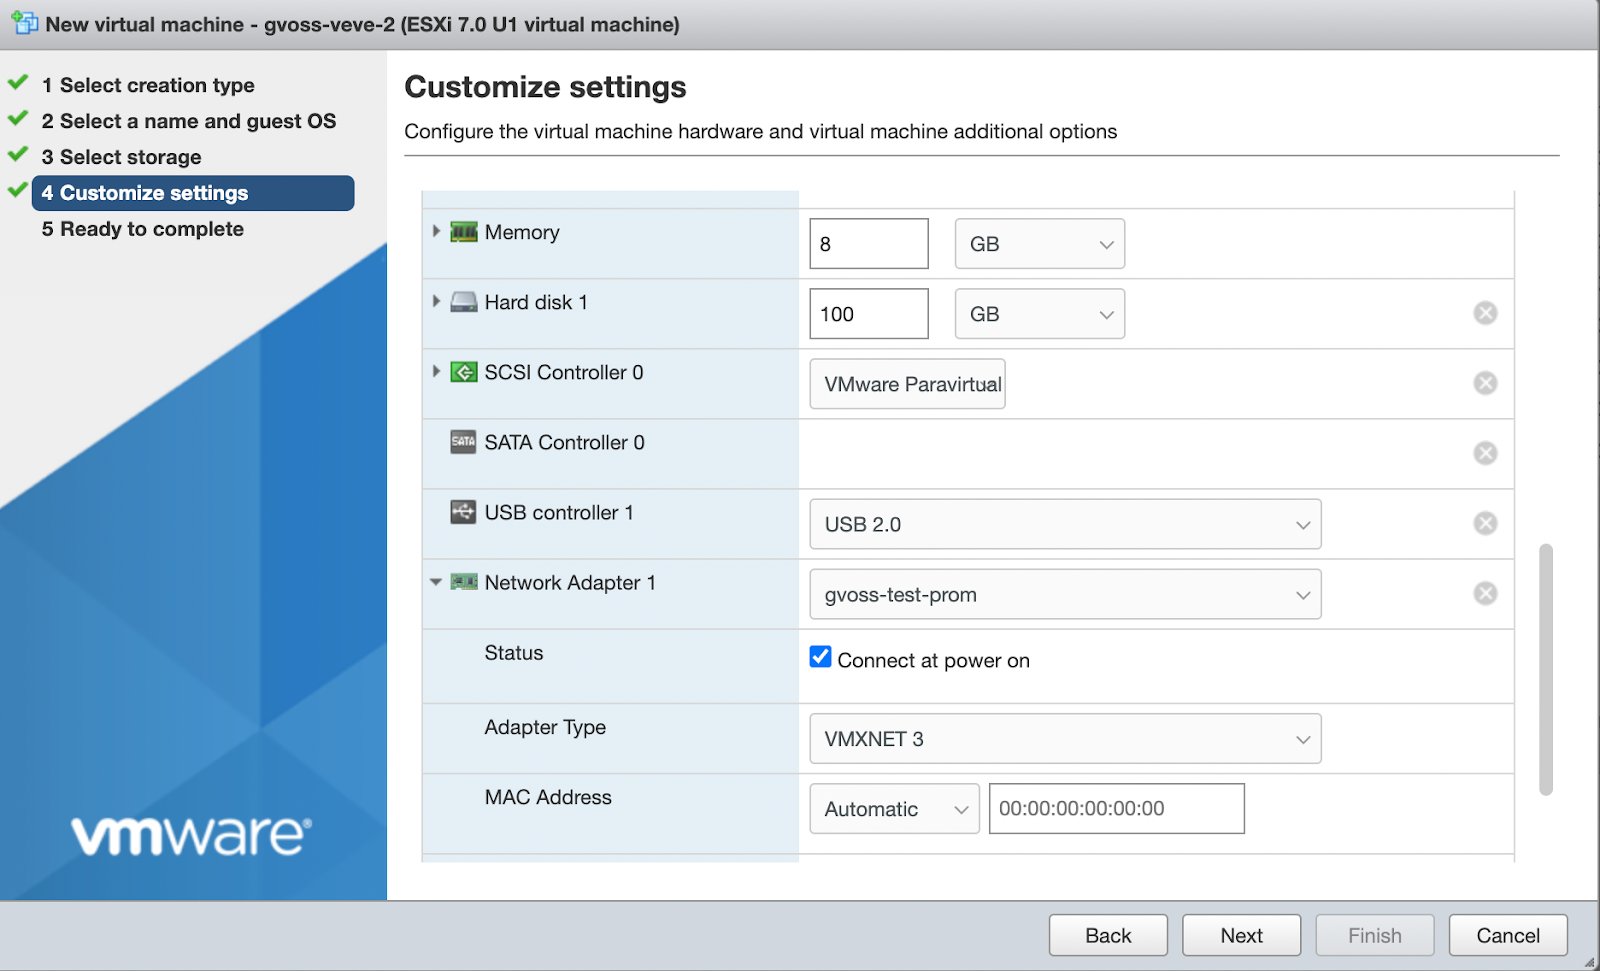
CD-ROM settings
Select the EVE-OS ISO (created in the previous section) for the guest installation.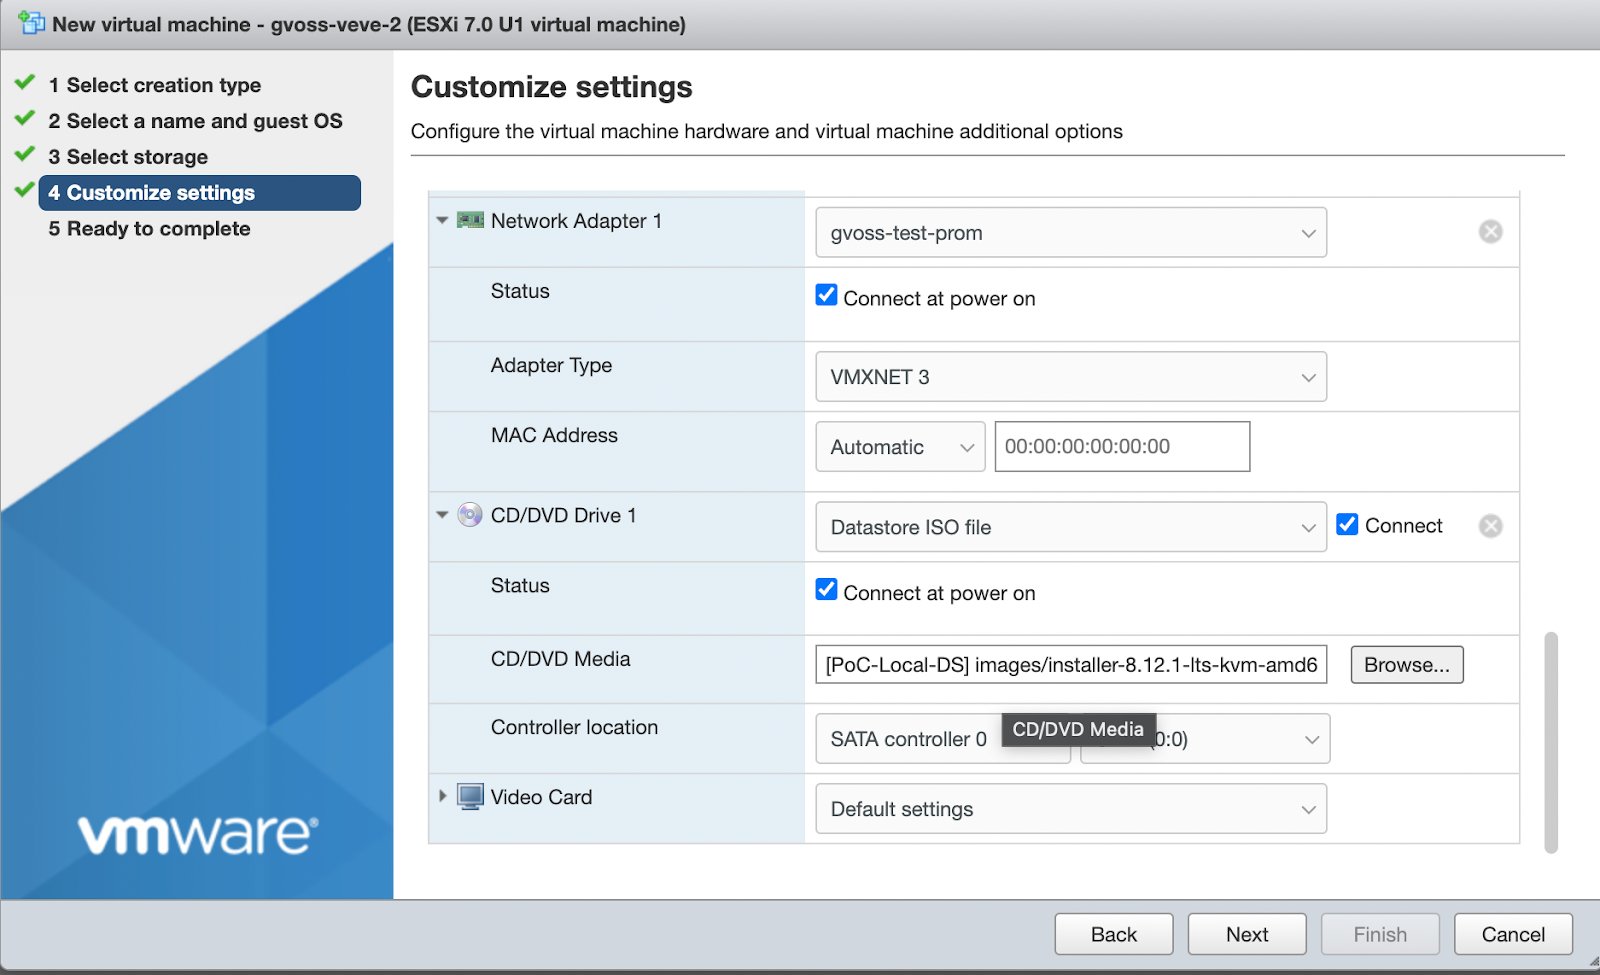
VM options
Ensure Enable UEFI secure boot is not selected.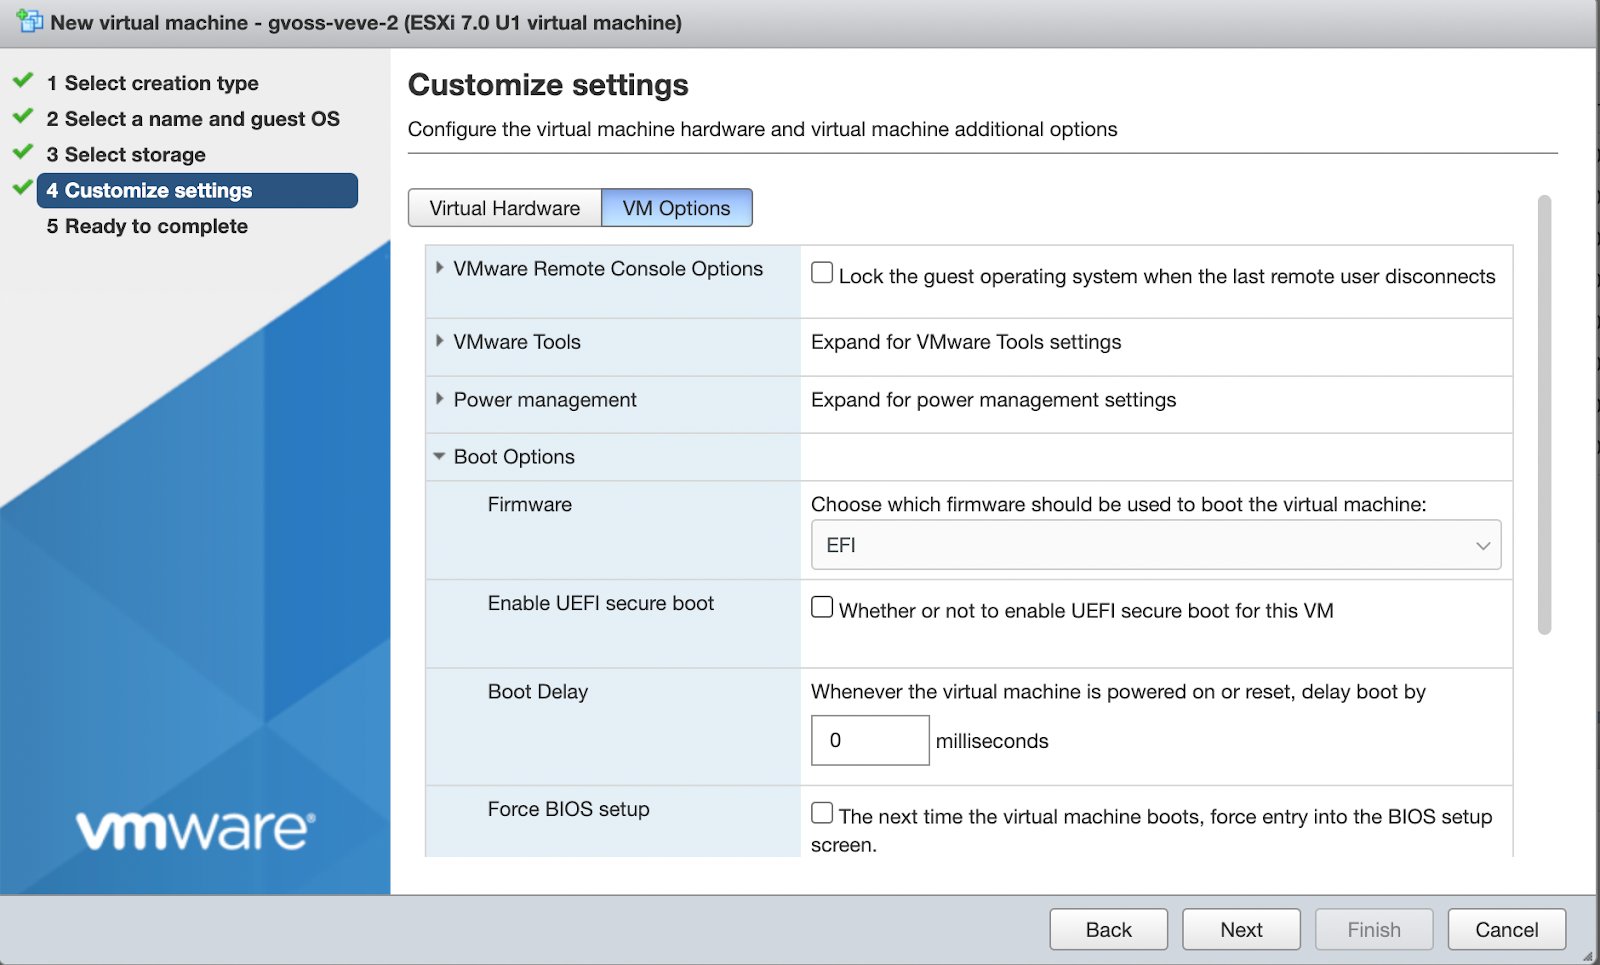
Get the Hardware Serial Number (macOS)
When onboarding a vEVE node, you need its hardware serial number derived from the VM UUID. The following procedure usesbrew and is written for macOS. For other platforms, use the equivalent PowerShell installation method.
- Install PowerShell.
- Install PowerCLI. Enter
yat the prompt.
- Configure PowerShell to ignore invalid certificates (if applicable). Enter
yat the prompt.
- Connect to the ESXi or vSphere server. Enter your credentials at the prompt.
- Get the vEVE VM UUID.
- Verify that the UUID was saved correctly.
564ded02f75268f111428e7cece8db81
- Format the UUID as a hardware serial number.
Onboard the Node Using ZCLI
Use the following PowerShell script to onboard a single vEVE node. ReplaceONBOARDING_KEY with the node’s onboarding key before running.
- Log in to ZCLI. See Get Started With ZCLI for authentication steps.
- Save the script as
onboardveve.ps1. - Run the script, replacing the placeholder values with your environment details.
Next Steps
Onboard Nodes
Complete onboarding for your virtual nodes.
Get Started with ZCLI
Reference for ZCLI authentication and commands.